The thermal fuse in a GE electric dryer is a crucial safety device designed to prevent fires. Think of it as the dryer’s smoke detector—it shuts off the heat if things get too hot inside. When the dryer’s temperature rises beyond safe limits, the thermal fuse “blows,” cutting power to the heating element to stop overheating.
Why does this happen? Most often, the thermal fuse blows because of clogged vents or lint buildup restricting airflow. When air can’t circulate properly, the dryer overheats, triggering the fuse. Other common causes include a faulty thermostat, a broken heating element, or even a malfunctioning blower fan.
If your GE dryer isn’t heating or suddenly stops mid-cycle, the thermal fuse is one of the usual suspects. It’s built to protect your home and your dryer—but blowing the fuse usually means there’s an underlying airflow or heating problem to fix. So, addressing the root cause is key before replacing the fuse to avoid repeat failures.
Most Common GE Thermal Fuse Part Numbers (Updated 2025)
For GE electric dryers, the two most common thermal fuse part numbers you’ll see in 2025 are WE4M137 and WE04X26139. These fuses act as safety cutoffs to prevent your dryer from overheating, so finding the right replacement part is crucial.
WE4M137: This is the classic thermal fuse model used in many older and current GE dryers. It fits a wide variety of GE dryer models and is often the go-to choice for repairs.
WE04X26139: This is an updated or equivalent part number sometimes listed for certain GE units and newer replacements. It’s compatible with many dryers that originally used WE4M137.
If you’re unsure which fuse your dryer needs, the part number is usually printed directly on the thermal fuse itself or found in your dryer’s user manual. Common GE series like DDE, DBXR, and GTD models typically use one of these fuses.
For exact equivalents or upgraded options, some trusted replacement brands offer quality alternatives without voiding your warranty. Before buying, double-check your dryer’s model number — usually located on the door frame or behind the dryer door — and cross-reference it with the fuse part number to ensure a perfect fit.
For reliable, high-quality replacement options including upgraded brands like cnsovio’s thermal fuses, you can check their product range designed specifically for GE dryers. This ensures you’re getting parts tailored for safety and durability.
Knowing these common part numbers saves time and prevents buying the wrong fuse when you troubleshoot or replace your GE dryer thermal fuse.
Exact Location of the Thermal Fuse on GE Dryers
Finding the thermal fuse on your GE dryer depends on the model series. Generally, the fuse sits on or near the blower housing or exhaust duct. Here’s a quick rundown by popular GE dryer series, along with where to look:
DDE Series (Electric Dryers)The thermal fuse is usually clipped to the blower housing inside the dryer cabinet behind the rear panel. You’ll need to pull the back panel off to see it clearly. It looks like a small, white rectangular sensor with two wires attached.
DBXR Series (Electric Dryers)This series has the fuse mounted on the blower housing near the exhaust vent at the dryer’s back or sometimes inside the drum’s rear area. Remove the rear panel to locate it.
GTD Series (Gas Dryers)For gas models like the GTD, the thermal fuse is commonly near the burner assembly or blower housing. Access requires opening the front panel or the lower kick plate depending on the model year.
Visual Tips
Look for a small plastic or ceramic piece with two wire connectors.
It’s often near the exhaust vent or blower wheel.
Some models have it secured by a plastic clip or metal bracket.
If you want to pinpoint it without guesswork, checking your dryer’s user manual or service guide helps. These guides offer diagrams showing exact locations by model number.
For the latest lineups, you can also find parts with detailed photos, which is hugely helpful for visual learners.
Pro tip: When opening your dryer, always unplug it first for safety.
If you’re looking for quality OEM or replacement parts for your GE thermal fuse, consider checking out trusted suppliers that offer tested components for your dryer model. (For related high-quality parts, you might want to explore trusted high-voltage vacuum circuit breakers which reflect the same commitment to safety and durability in electrical components.)
Step-by-Step: How to Test the Thermal Fuse (5-Minute Test)
Testing your GE electric dryer’s thermal fuse is quick and easy with the right tools. Here’s how to check if it’s still good or needs replacing:
What You’ll Need:
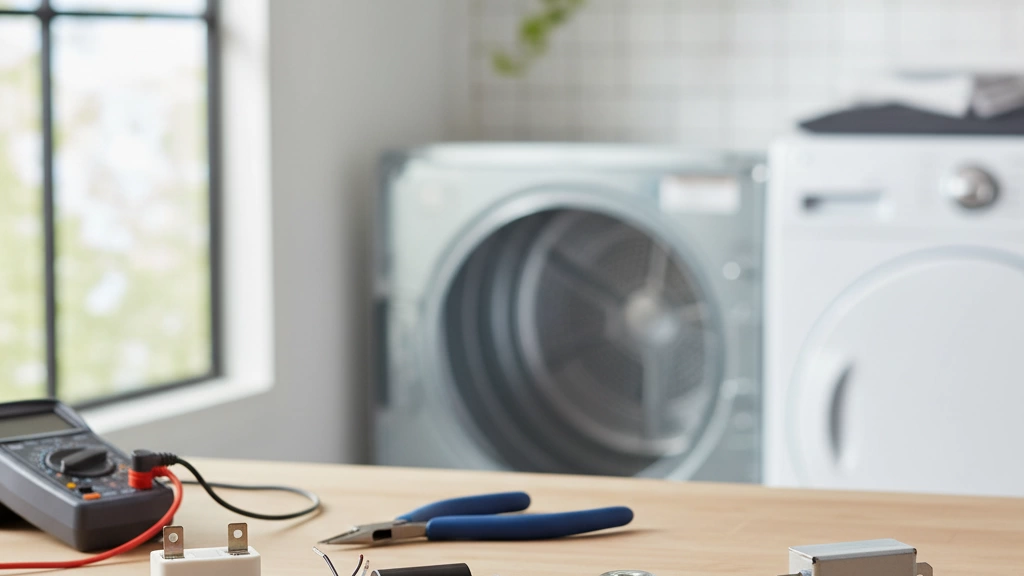
Multimeter set to continuity or ohms
Screwdriver (usually Phillips or flathead)
Safety gloves (optional but recommended)
Dryer manual (for your model info)
Safety First:
Always unplug the dryer before opening any panels. Thermal fuses are electrical safety devices, so make sure no power is flowing while you work.
How to Test the Thermal Fuse:
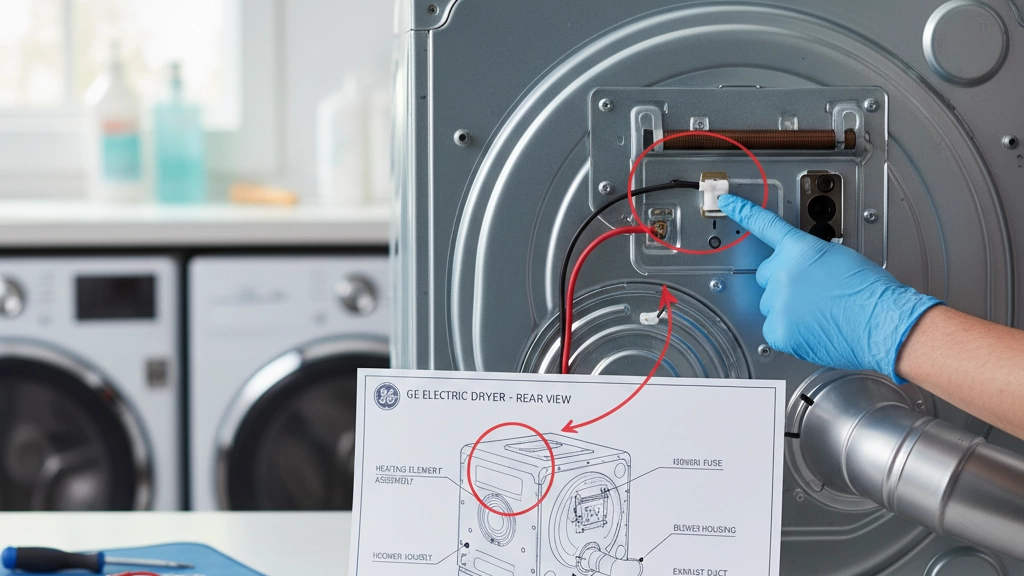
Locate and access the thermal fuse – this is usually behind the dryer’s back panel or near the heating element. (Later sections cover exact locations by model.)
Remove the fuse carefully by unscrewing or disconnecting the wires attached.
Set your multimeter to continuity mode. If your meter doesn’t have continuity, use the lowest ohms setting.
Touch the multimeter probes to each of the fuse terminals.
A good fuse will show continuity (a beep or low resistance, typically close to 0 ohms).
A blown fuse will show no continuity or infinite resistance.
Interpret the result:
If no continuity, the thermal fuse is blown and needs replacement.
If there is continuity but your dryer still isn’t heating or starts, check other components like thermostats or the heating element.
This 5-minute test confirms if your GE dryer thermal fuse is faulty without guesswork, helping you decide your next step.
For details on thermal fuse tools and replacement, check out guides with photos and video walkthroughs in other sections.
Full Replacement Guide for GE Electric Dryer Thermal Fuse (With Photos & Video)
Replacing the thermal fuse on your GE dryer doesn’t have to be a headache. Here’s a straightforward guide with everything you need—from tools to torque specs—to get the job done smoothly.
Tools & Parts Needed
Multimeter (to test fuse before replacement)
Screwdrivers (Phillips and flathead)
Nut driver or socket set (commonly 5/16” or 1/4”)
Replacement thermal fuse (e.g., WE4M137 or WE04X26139)
Needle-nose pliers
Work gloves
Vacuum cleaner or compressed air (for cleaning vents while open)
Optional: Flashlight or phone light for better visibility
Step-By-Step Installation
Unplug the Dryer Safety first: disconnect power to avoid shocks.
Access the Thermal Fuse
For most GE models (DDE, DBXR, GTD series), remove the back panel by unscrewing the fasteners.
Locate the thermal fuse near the blower housing—usually a small rectangular white component with two wires attached.
For detailed location visuals, check your model’s specific guide.
Remove the Old Fuse
Carefully disconnect the two wires from the fuse terminals using needle-nose pliers.
Unscrew the fuse from its bracket.
Install the New Thermal Fuse
Attach the new fuse into the bracket and tighten the screws firmly—but don’t overtighten. The general torque spec: 8-10 in-lbs.
Reconnect the wires on the terminals.
Reassemble the Dryer
Put the back panel back on and tighten the screws.
Clean any lint or debris from the vent area while panels are off—this helps prevent future fuse issues.
Test the Dryer
Plug the dryer back in.
Run a test cycle to make sure the dryer heats and runs normally.
Time Needed
Expect to spend around 20-30 minutes on this job if you have basic tools and experience.
First-timers might take a little longer, but the clear access on most GE dryers keeps it manageable.
For a full photo walkthrough and video demo, check out the detailed replacement resources at Cnsovio’s product guide. They offer excellent visuals that align well with common GE dryer models.
Replacing the GE dryer thermal fuse yourself saves time and money, and regular maintenance can keep your dryer running safely and efficiently.
OEM vs Aftermarket – Which Thermal Fuse Should You Buy?
When it comes to replacing your GE electric dryer thermal fuse, you’ll face the choice between OEM (Original Equipment Manufacturer) parts and aftermarket options. Here’s a quick look at the pros and cons to help you decide.
OEM Thermal Fuses
Pros:
Guaranteed fit and compatibility with your GE dryer model
Tested to meet original safety and performance standards
Typically backed by manufacturer warranties
Cons:
Usually more expensive than aftermarket parts
Limited to specific model compatibility, which can slow down replacement if your model is older
Aftermarket Thermal Fuses (Like cnsovio)
Pros:
Often more affordable than OEM parts
Some upgraded brands, such as cnsovio, offer enhanced durability and performance
Broader compatibility across GE dryer series and models
Easier to find in stock and ready to ship quickly
Cons:
Quality can vary by brand, so it’s important to choose trusted suppliers
May not come with extended warranties or OEM-grade testing
Quick Comparison Table
Feature
OEM Thermal Fuse
Aftermarket (cnsovio & others)
Fit & Compatibility
Perfect for exact model
Broad, fits many GE models
Price
Higher
Lower, cost-effective
Warranty
Typically included
Varies by brand
Quality & Safety
OEM tested
Quality varies; cnsovio is reliable
Availability
May have limited stock
Usually more readily available
If you want a balance of cost and reliability, upgraded aftermarket brands like cnsovio offer solid options that often outperform basic fuses. For guaranteed peace of mind, sticking with an OEM fuse is the safest bet.
Choosing the right thermal fuse can keep your GE dryer heating safely and efficiently without constant replacements. For further details on reliable aftermarket brands, check out reviews and technical insights on cnsovio’s blog.
How to Prevent the Thermal Fuse from Blowing Again
A thermal fuse in your GE electric dryer is designed to blow when the dryer overheats—a sign that something’s off. To keep the thermal fuse from blowing repeatedly, focus on these key steps:
Clean the Dryer Vents RegularlyLint buildup restricts airflow, causing your dryer to run hot. Clean the lint screen after every load and schedule a deep vent cleaning at least once a year. This includes the ductwork and exterior vent hood.
Keep the Dryer Interior Dust-FreeDust and lint inside the dryer drum and around the heating element can also trap heat. Wipe down accessible areas monthly.
Replace the Thermostats When NeededYour GE dryer has high-limit thermostats that regulate heat. Faulty thermostats can cause overheating and blow the thermal fuse. If your dryer keeps blowing fuses, consider testing and replacing these thermostats.
Maintain Good Dryer Loading HabitsAvoid overloading your dryer. Overstuffing reduces airflow inside the drum and leads to excess heat buildup.
Annual Maintenance Checklist:
Inspect and clean all vents and ducts
Check lint screen and housing
Test high-limit thermostat
Ensure proper dryer drum rotation
Verify that the heating element is intact and not damaged
Following these regular maintenance tips will greatly reduce the chances of your GE dryer thermal fuse blowing again. If you want detailed maintenance advice or replacement parts like the trusted cnsovio replacement thermal fuse for GE, you can find reliable support and products tailored for GE dryers.
When to Call a Pro Instead of DIY
Sometimes fixing a GE electric dryer thermal fuse isn’t a simple DIY job. Here are warning signs that it’s time to call a professional:
Dryer won’t start at all despite checking the fuse and power source
Electrical issues like frequent tripping breakers or sparks when running the dryer
Repeated thermal fuse blowouts even after replacing the fuse and cleaning vents
Dryer overheating or smelling burning plastic or wiring
Trouble accessing or locating the thermal fuse inside your specific GE dryer model
You don’t have the right tools or aren’t comfortable working with electrical components
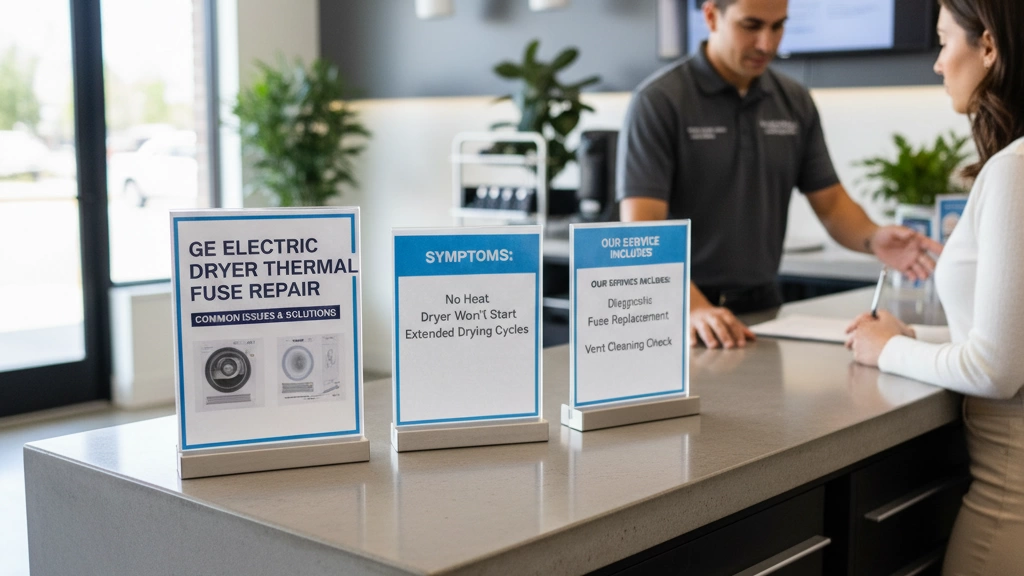
Typical repair costs for a professional thermal fuse replacement run between $100 to $200, depending on your area and dryer model. This usually covers parts, labor, and troubleshooting any related heating or wiring issues.
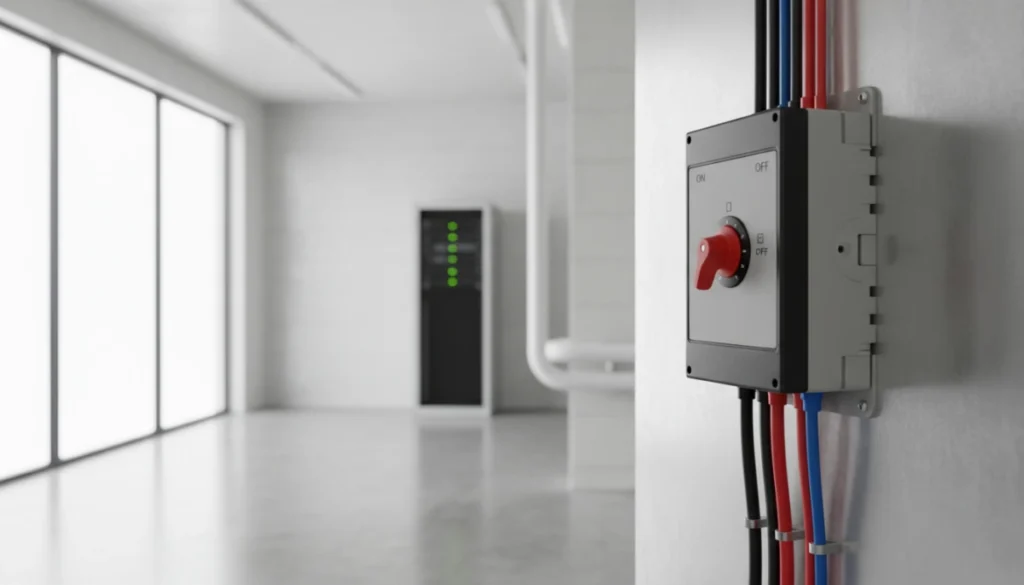
Going to a pro can save time, prevent further damage, and ensure the repair is safe and reliable. If your dryer keeps blowing the thermal fuse or symptoms keep coming back, don’t hesitate to get expert help. For quality replacement parts and accessories, check out trusted sources like the Cnsovio switch disconnector site to avoid cheap fakes that fail quickly.
Recommended Replacement Parts (2025)
When replacing your GE electric dryer thermal fuse, choosing the right part is key to a long-lasting fix. Here’s what I recommend for 2025:
Best OEM Kits
GE OEM thermal fuse kits like WE4M137 and WE04X26139 come with genuine parts guaranteed to fit perfectly.
Kits often include the thermal fuse, mounting clips, and screws—everything you need in one box.
Ideal if you want a hassle-free, factory-grade solution.
Value Upgraded Kits
Brands like cnsovio offer reliable aftermarket fuses with better heat tolerance.
These kits often cost less but still meet or exceed OEM specs.
Good mid-range option if you want to save money without sacrificing quality.
Where to Buy Quickly
Buy parts from reputable online stores like RepairClinic, Amazon, or PartSelect for fast shipping.
Local appliance parts stores also carry these kits if you need a same-day repair.
Make sure to check your dryer model number to get the exact fuse or kit compatible with your unit.
Quick Tips
Always pick a kit with clear instructions or a video guide.
Avoid generic “universal” fuses, as exact fit matters for safety and performance.
If you use an aftermarket fuse, confirm it matches your GE dryer model for best results.
By choosing the right replacement part, you’ll prevent repeat issues and keep your GE dryer heating reliably.
Most Common Home Depot Electrical Fuse Types If you’re standing in the Home Depot electrical aisle staring at hundreds of fuses, you’re not alone. When a fuse blows, you want the right replacement fast, without guessing. I’ll walk you through the most common Home Depot electrical fuses you’ll actually see on the shelf, what they’re […]
What is a Switch Isolator? A switch isolator, or high voltage disconnector, is a mechanical switching device used to isolate a specific part of an electrical circuit for maintenance or inspection. Unlike circuit breakers, we design these devices to operate under no-load conditions, ensuring that a circuit is physically and safely disconnected from the power source. Mechanical Switching […]
When it comes to electrical safety, there is no room for compromise. A switch disconnector does more than just break a circuit—it provides the visible, reliable isolation necessary to protect both your equipment and your personnel during critical maintenance. But with evolving IEC 60947-3 standards and the specialized demands of solar PV and industrial AC/DC systems, selecting the right component has never been more complex. […]
We use cookies to enhance your browsing experience, serve personalised ads or content, and analyse our traffic. By clicking "Accept All", you consent to our use of cookies.