A fuse electrical panel is the “control center” of your home’s power, but with old‑school protection instead of modern breakers. It takes electricity from the utility line, distributes it to each circuit in your house, and uses fuses to cut power if something goes wrong.
Simple definition
In plain English:
A fuse electrical panel is a metal box that:
Receives power from the utility company
Splits that power into separate circuits (lights, outlets, appliances)
Protects each circuit with a fuse that “sacrifices” itself during an electrical overload
Instead of flip-style circuit breakers, it uses fuses that melt and break the circuit when the current gets too high. Once a fuse blows, you replace it—there’s no resetting like with a breaker.
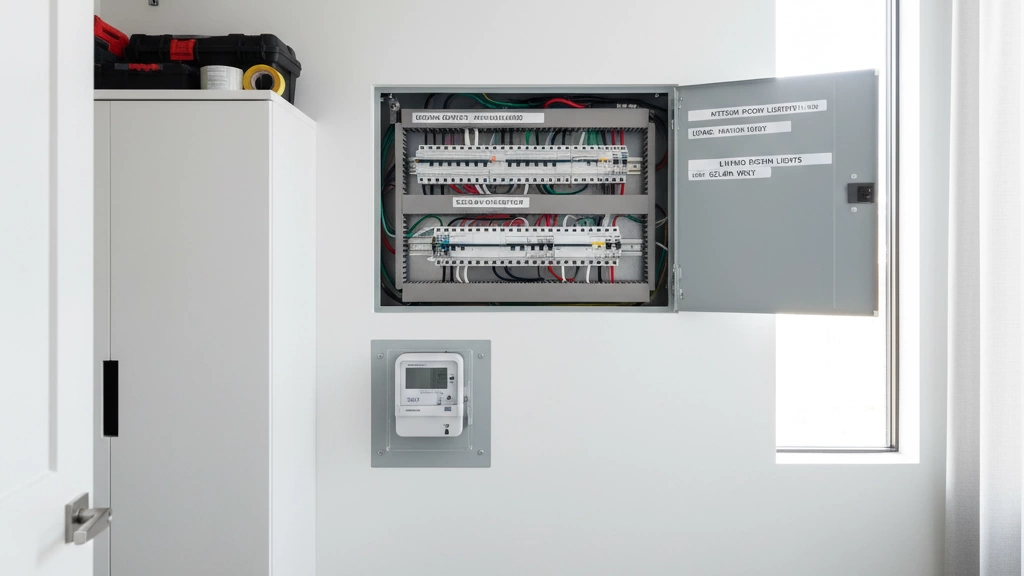
Core components
Most home fuse panels include:
Main service lugs or a main fuse
Where the power from the street enters your home
Often rated 60 amp or 100 amp in older houses
Individual fuses
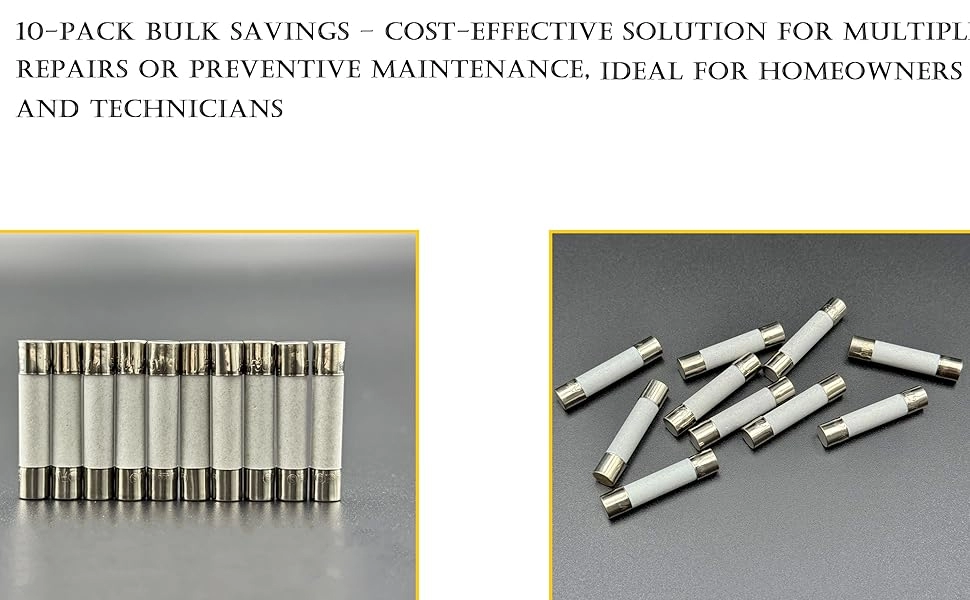
Plug fuses: screw-in type, commonly 15A, 20A, 30A
Cartridge fuses: larger, tube-like, used for big loads like ranges or A/C
Bus bars and terminals
Metal bars that distribute power to each circuit
Neutral and ground bars where wires terminate
Metal enclosure (the box)
Usually found in a basement, garage, or hallway
Designed to contain heat and sparks if a fuse blows
Every fuse has an amperage rating (15A, 20A, 30A, etc.). That rating must match the wire size and the circuit’s intended load. If you “oversize” a fuse, you remove its safety function and create a fire hazard.
Historical context
Fuse electrical panels were the standard for decades:
Common in homes built roughly before the 1960s–1970s
Designed for smaller electrical loads:
Few outlets
No central air
Limited kitchen appliances
Often 60 amp or early 100 amp service, which is very low by today’s global standards
As our homes started demanding more power—air conditioning, dishwashers, big TVs, EV chargers—fuse panels struggled to keep up. That’s when modern circuit breaker panels (also called “load centers”) took over as the global norm.
Today, many older homes still run on fuse panels. They aren’t automatically “bad” or illegal, but:
They’re easy to misuse (wrong fuse size, penny behind a fuse—yes, people really did that).
They usually lack room for new circuits.
Insurers in many markets now flag old fuse boxes as a risk and may require an electrical panel inspection or even a circuit breaker upgrade.
In short: a fuse electrical panel is a simple, clever, but aging way to protect your home’s wiring. It did its job well for its time—but it was never designed for the modern, high-demand, gadget-filled home.
How Does a Fuse Electrical Panel Work?
A fuse electrical panel is simple at its core: it’s a traffic controller for electricity that protects your home when something goes wrong.
Step-by-step: How power flows through a fuse panel
Here’s the basic flow in plain terms:
Power comes from the utility lines into your main service (usually 60A, 100A, or 200A).
It enters the main lugs or main disconnect in your fuse electrical panel.
From there, power is split into individual branch circuits (lighting, outlets, oven, AC, etc.).
Each circuit passes through a fuse rated for a specific amperage (15A, 20A, 30A, etc.).
If the electrical load stays within that rating, power flows normally.
If there’s a short circuit or overload, the fuse element melts (“blows”) and cuts off power, preventing wiring from overheating and potentially catching fire.
No reset button, no second chances: once a fuse blows, it must be replaced.
Main fuse types in residential panels
You’ll typically see a few common fuse styles in a home fuse box:
Screw-in plug fuses
Look like small round plugs that screw into a socket.
Common ratings: 15A, 20A, 30A.
Often used for lighting and general outlet circuits.
Cartridge fuses
Cylindrical, with metal caps on both ends.
Used for higher loads like ranges, water heaters, and older air conditioners.
Available in many ratings, including 60A, 100A, and above.
Time-delay (slow-blow) fuses
Designed to handle brief startup surges (motors, compressors) without blowing.
Great for fridges, pumps, and some tools that draw a higher current only for a split second.
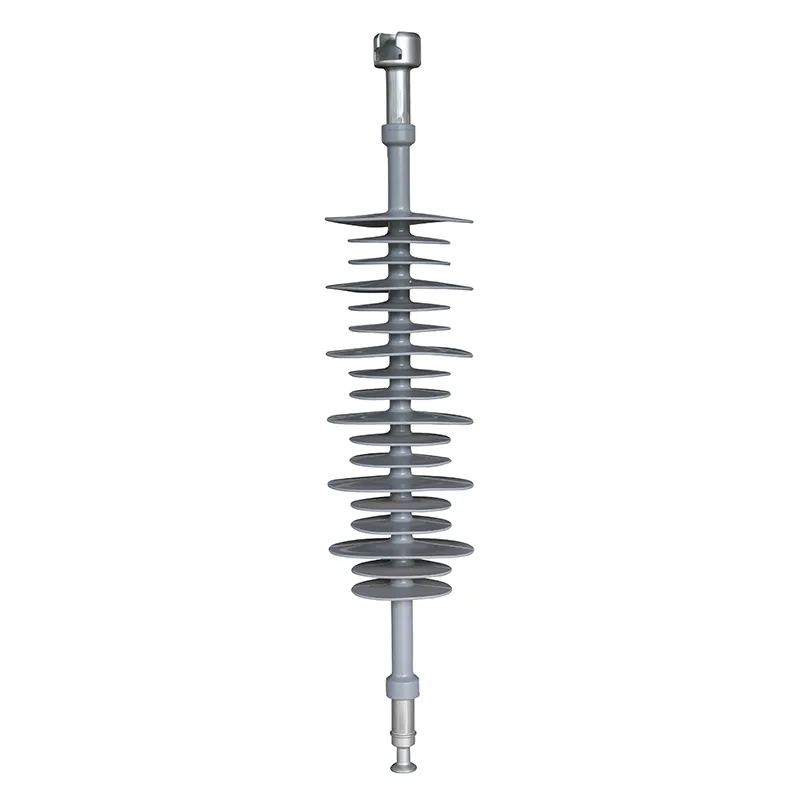
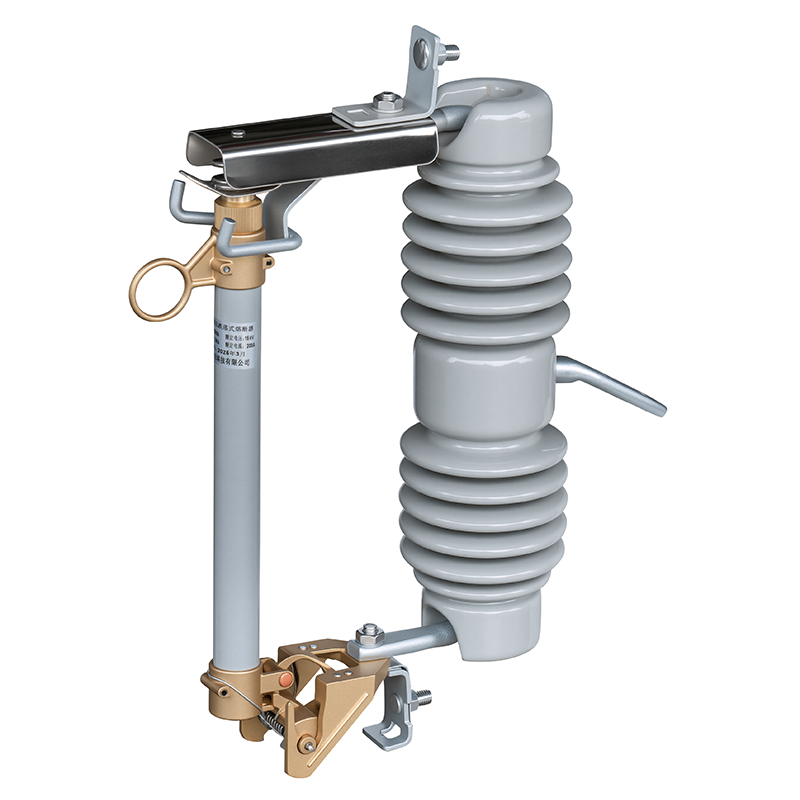
For industrial or high-voltage uses, we use more advanced cartridge designs like our own RW12 high-voltage fuse range, which follows the same principle but handles much higher voltages and fault levels.
Amperage ratings: why they matter
The amperage rating on a fuse must match:
The wire size in the circuit
The expected load (appliances, lighting, outlets)
Local electrical code and, often, insurance requirements
Some quick rules of thumb:
15A fuse → usually for lighting and standard outlets (with 14 AWG wire in many regions)
20A fuse → kitchen, laundry, or circuits with heavier plug-in loads
30A+ fuse → electric dryer, range, water heater, or subpanel feeds
Never “oversize” a fuse to stop it blowing. A 30A fuse on wiring meant for 15A doesn’t give you more power; it just removes the protection and creates a fire risk. If you consistently blow fuses, that’s a sign of an overload or wiring issue, not a fuse problem.
If you want a deeper look at how fuses are built and rated, check out a dedicated high-voltage fuse product like our RW12 high-voltage fuse, which shows how professional-grade designs manage fault currents safely:
You plug in a space heater, TV, and game console on the same outlet.
The total draw exceeds 15A on that circuit.
The 15A fuse heats up and melts internally.
Result: that circuit goes dead, but your wiring doesn’t overheat.
Example 2: Old motor with a startup surge
Your basement sump pump kicks on.
A standard fast-blow fuse might trip instantly from the surge.
A properly sized time-delay fuse handles the brief surge and stays intact, only blowing if the pump actually jams or shorts.
Example 3: Hidden wiring fault in an old house
A damaged cable in a wall starts to short.
Current spikes rapidly, way above the fuse rating.
The fuse blows almost immediately, stopping a possible fire.
In short, a fuse electrical panel works by sacrificing a cheap, replaceable part (the fuse
Spotting the Signs: Is Your Fuse Electrical Panel Failing or Just Outdated?
A fuse electrical panel can quietly handle your power needs for decades – until it doesn’t. Knowing the warning signs lets you decide if you just need a blown fuse replacement or a full circuit breaker upgrade.
Common warning signs you shouldn’t ignore
If you notice any of these, your fuse box is waving a red flag:
Lights flicker or dim when you use appliances (microwave, hair dryer, AC)
Fuses blow often, especially on the same circuits
Warm or hot panel cover, or fuses that feel hot to the touch
Buzzing, crackling, or humming from the basement electrical panel
Outlets that are discolored, loose, or smell burnt
Some rooms never seem to have “enough power” for modern devices
These are classic electrical overload signs and usually mean the panel is at or beyond its capacity.
Physical red flags on a fuse electrical panel
Open the panel door and do a quick visual check (no touching any metal parts):
Burn marks, soot, or melted plastic around fuse holders
Rust, corrosion, or moisture stains on or inside the door
Old cloth-covered or brittle wiring coming into the panel (old house wiring hazards)
Mixed, random fuse sizes (e.g., 30A fuse on thin wire) instead of consistent amperage rating
Missing cover plates or exposed wiring
If you see burn marks, heavy rust, or obvious damage, stop using that panel and book an electrical panel inspection right away. For larger building systems, we pair panels with high-voltage protection gear like a ring main unit and properly matched isolator switches to prevent dangerous faults before they hit the main distribution.
Is it failing or just outdated?
Ask yourself these quick questions:
How old is your home?
Built before the 1970s with no major electrical work? Your fuse panel is likely outdated.
What’s your main service size?
A 60 amp or 100 amp panel replacement is common when people add EV chargers, heat pumps, or full electric kitchens.
Do you use a lot of power-hungry devices?
Multiple AC units, space heaters, dryers, induction cooktops, gaming rigs – these push old fuse panels to the limit.
Has insurance flagged it?
Some insurers now require a modern load center installation or breaker panel to keep or renew coverage (insurance electrical requirements).
If the system works but feels limited (you’re constantly juggling what’s plugged in), it’s probably “just outdated.” If it’s hot, noisy, or smells burnt, it’s moving into “unsafe and failing” territory.
Quick diagnostic checklist (DIY fuse troubleshooting – no tools)
You can safely do this without opening live parts:
Stand near the panel:
Do you hear buzzing or crackling?
Is there any burnt or fishy smell?
Light and outlet test:
Turn on a few big appliances; do lights dim or fuses blow?
Visual:
Check for rust, burn marks, or loose door hinges.
Capacity feel:
Do you avoid running certain appliances together because “the fuse will blow”?
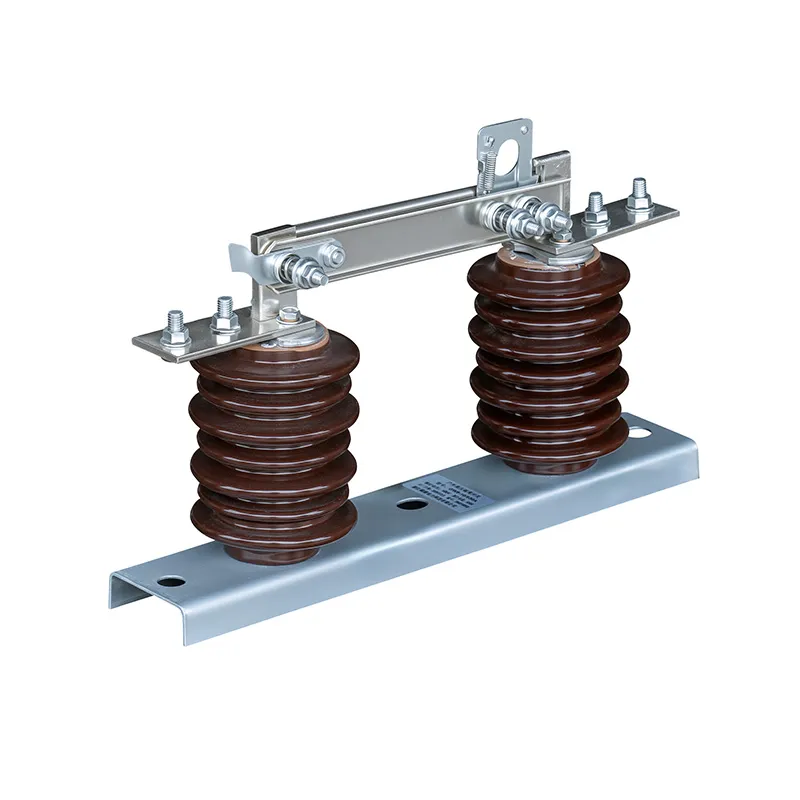
If you answer “yes” to more than two of these, it’s time to talk to an electrician about a fuse vs breaker comparison and a possible upgrade path. You’ll get better protection, more capacity, and cleaner integration with modern surge protection and, for industrial or utility setups, with gear like a properly rated high-voltage isolator switch that keeps maintenance safe and outages localized.
Bottom line: a fuse electrical panel doesn’t have to be dangerous, but it does have limits. Spot the symptoms early, and you can plan an upgrade on your terms instead of reacting to a blackout or an insurance notice.
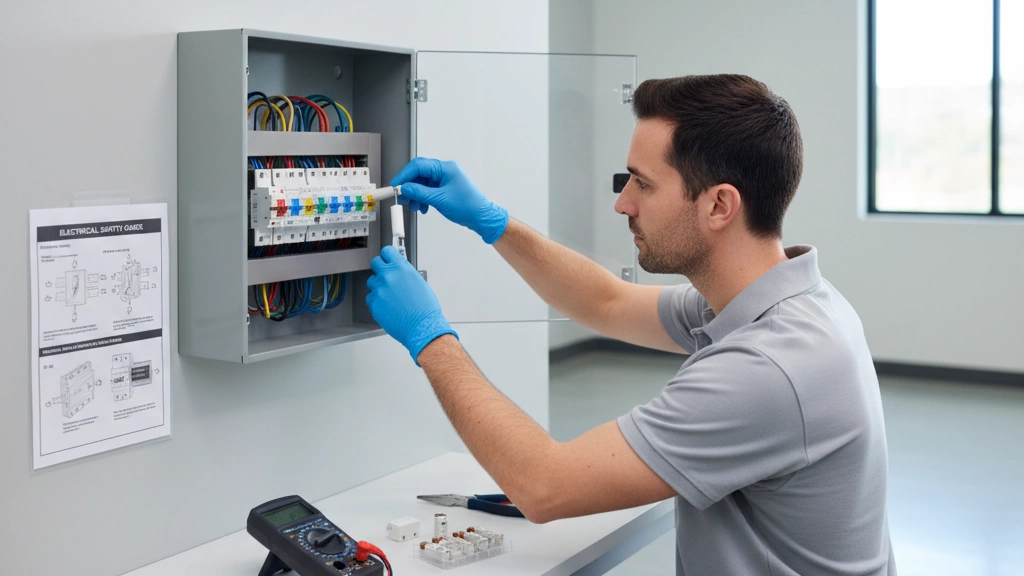
Hands-On Guide: Safely Replacing a Blown Fuse in Your Fuse Electrical Panel
If a circuit goes dark in your home and you’re using a fuse electrical panel instead of breakers, there’s a good chance you’re looking at a blown fuse replacement. Here’s how I handle it safely and efficiently.
1. Safety First (Don’t Skip This)
Before you touch your home fuse box:
Turn off and unplug major appliances on the dead circuit (AC, heaters, washers, ovens). This prevents an instant re-blow when power comes back.
Stand on a dry surface (no wet basement floors).
Use proper lighting (battery work light or flashlight – not candles).
Wear safety glasses and dry, insulated gloves if you have them.
If you smell burning, see melted parts, or hear buzzing from the basement electrical panel, stop and call an electrician.
If you’re not 100% sure what you’re doing or your panel looks very old or damaged, it’s safer to bring in a pro for an electrical panel inspection.
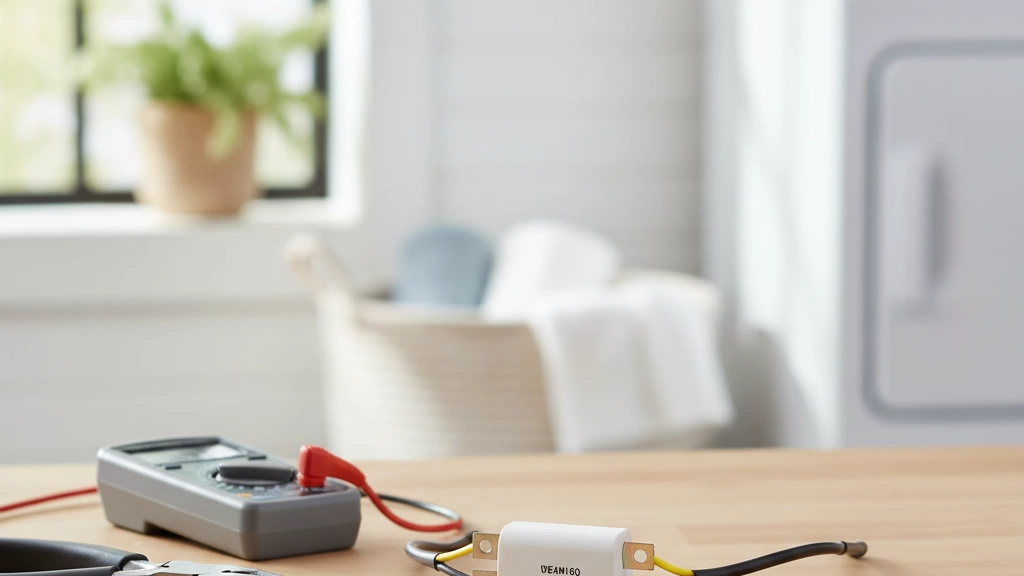
2. Tools and Gear You’ll Need
Keep a small fuse panel emergency kit ready:
Replacement fuses with the same amperage rating (15A, 20A, 30A, etc.)
Flashlight or headlamp
Insulated screwdriver (only if your panel type requires it)
Label stickers or marker (to note circuits for next time)
Always match the amperage rating guide printed on the panel or existing fuse. Never “size up” to stop fuses from blowing.
3. How to Find the Blown Fuse
In most fuse vs breaker setups, fuses are either screw-in types or cartridge fuse types.
Do this:
Open the fuse electrical panel door carefully.
Look for:
A glass fuse with a broken or blackened filament.
A ceramic fuse with scorch marks or discoloration.
A cartridge fuse that looks burned or has melted ends.
Some panels have a small indicator window that turns dark when blown.
If you can’t clearly see which one is blown, or multiple look damaged, call a licensed electrician. That could point to electrical overload signs or old house wiring hazards, not just a random failure.
4. Step-by-Step: Replacing a Screw-In Fuse
For common screw-in style:
Switch off the main disconnect if your panel has one.
Confirm the circuit label (e.g., “kitchen outlets,” “bedrooms”) so you know what you’re working on.
Unscrew the blown fuse slowly, keeping your fingers on the insulated edges.
Match the amperage rating:
15A – usually for lights and most outlets
20A – often kitchens, laundry, or some appliances
30A+ – larger loads (water heaters, some AC units)
Screw in the new fuse snugly, but don’t over-tighten.
Turn the main power back on (if you shut it off).
Test the circuit by turning the lights or appliance back on.
If it blows again right away, you likely have a short circuit or overload, not a bad fuse. Don’t keep replacing – call a pro.
5. Replacing a Cartridge Fuse (Pull-Out Type)
Many older 100 amp panel or main disconnects use cartridge fuses:
Turn off all branch circuits if possible.
Pull out the fuse block or pull-out handle firmly with one hand, keeping your other hand away.
Place it on a dry, non-metal surface.
Swap the cartridge fuses with identical rating and type.
Reinsert the fuse block fully and evenly.
Turn circuits back on one by one to avoid a sudden electrical overload.
If you feel heat, see arcing, or the block is cracked or burned, you’re in unsafe territory. This is where many homeowners choose a circuit breaker upgrade or full modern load center installation.
6. Common Mistakes to Avoid
These are the issues I see most often:
Oversizing fuses (“The 15A keeps blowing, I’ll just use 30A.”)
This is dangerous and a major insurance electrical requirement violation. It can overheat wires and cause fires.
Ignoring repeated blown fuses
Constant problems usually mean bad wiring, loose connections, or overloaded circuits, especially in older homes.
Using the wrong fuse type
Time-delay vs standard, wrong cartridge fuse types, or mixing brands and ratings can create overheating or nuisance trips.
Overloaded power strips
Too many appliances on one outlet/circuit causes frequent fuse blows. Spread loads across circuits where possible.
No surge protection
Power spikes can pop fuses and damage electronics. A whole-house power surge protection device is often worth it.
7. When to Stop DIY and Call a Pro
Stop and get a licensed electrician if you notice:
Burn marks or melted parts in the fuse electrical panel
Fuses blowing even after moving appliances to other circuits
Flickering lights, buzzing, or warm panel covers
Very old, rusty, or unlabeled panels, especially in old houses
In many regions, insurance, resale buyers, and local codes increasingly push toward a circuit breaker upgrade instead of keeping legacy fuse panels. A modern breaker panel is safer, easier to reset, and better suited for today’s loads like EV chargers, heat pumps, and high-end appliances.
Handled correctly, a blown fuse replacement is manageable for many homeowners. But frequent issues or obvious damage are your signal: that fuse box is telling you it’s time to think about a breaker panel upgrade and a full electrical panel inspection.
Fuse Electrical Panel vs Circuit Breaker Panel
If you still have a fuse electrical panel at home, it’s probably old, limited, and harder to live with than it needs to be. Here’s the clean comparison so you can see why most homeowners move to a modern breaker panel.
Quick Comparison: Fuse Panel vs Breaker Panel
Feature
Fuse Electrical Panel
Circuit Breaker Panel
Reset after overload
Replace fuse every time
Flip breaker back ON
Convenience
Need spare fuses, panel often confusing
Clear labels, easy reset
Safety level
Older tech, more risk if misused
Built-in advanced safety options (AFCI/GFCI)
Expansion for new circuits
Often maxed out, hard to expand
Designed to add more circuits and subpanels
Handling modern loads
Struggles with ACs, EV chargers, big ovens
Built for today’s appliances and future upgrades
Insurance & code compliance
Sometimes flagged or surcharged
Typically preferred by insurers and inspectors
Overload risk
Easy to install wrong higher-amp fuse
Fixed rating, much harder to “cheat”
Smart features
None
Can integrate surge protection and smart monitoring
Typical use today
Old houses, temporary use
Standard in modern homes and renovations
Why Circuit Breaker Panels Make More Sense Today
For most homes and small businesses, a circuit breaker upgrade is the practical move:
Faster recovery: A tripped breaker is a 10‑second reset. A blown fuse means finding the right fuse, turning off power, and replacing it.
Better protection: Breaker panels easily support whole‑home surge protection, AFCI, and GFCI breakers to cut down fire and shock risks.
Supports higher loads: If you’re adding EV charging, heat pumps, hot tubs, or home offices with heavy electronics, a 100 amp panel replacement or larger breaker panel is the standard path.
Future-ready: Need more circuits later? A breaker panel is built to grow with your home and can tie into more advanced solutions like a medium-voltage circuit breaker system for larger facilities.
When a Fuse Electrical Panel Might Still Be Okay
Fuse panels aren’t automatically dangerous if:
The wiring is in good shape.
The fuses match the amperage rating guide for each circuit.
The panel has had a recent electrical panel inspection by a licensed electrician.
Your home has light, stable loads and you rarely blow fuses.
You might keep a fuse panel a little longer if:
You’re in a small, older home with low power use.
You’re planning a full renovation later and don’t want to upgrade twice.
Local codes still allow fuse panels and your insurance isn’t pushing for a circuit breaker upgrade.
Still, if you see regular electrical overload signs, hot or discolored fuse bases, or you’re running lots of modern devices, it’s time to seriously consider moving to a modern load center.
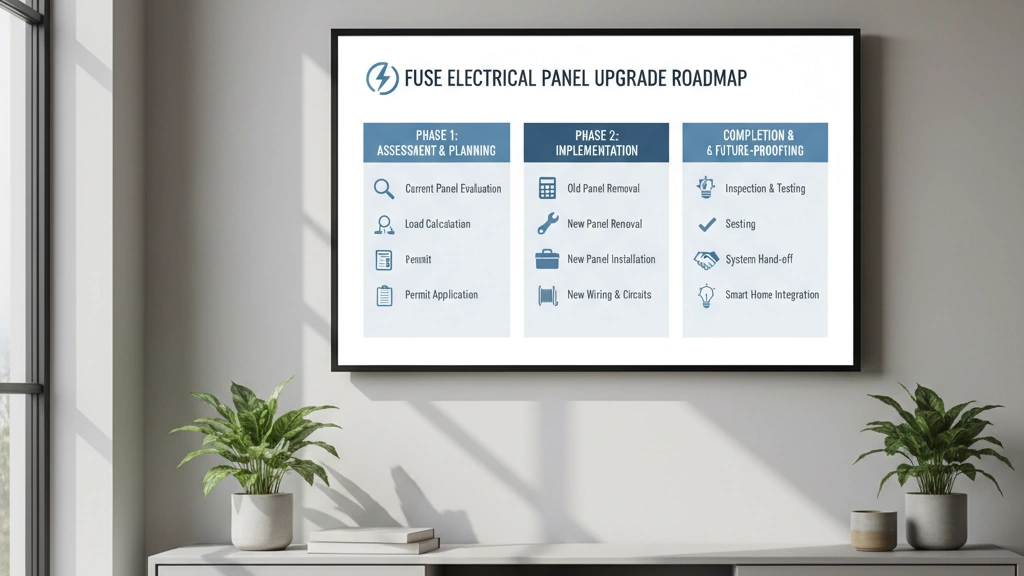
The Upgrade Roadmap: From Fuse Electrical Panel to Modern Breaker System
Upgrading from a fuse electrical panel to a modern circuit breaker panel isn’t just a tech upgrade – it’s a safety, insurance, and property-value move. Here’s the clean, practical roadmap I recommend.
1. Assess Your Electrical Needs
Before calling an electrician, get clear on what you actually use now and what you’ll need soon:
List big loads: EV charger, electric oven, heat pump, AC, hot tub, workshop tools.
Check current service size:
60A or 70A fuse electrical panel → almost always undersized for modern homes.
100A fuse panel → borderline if you have or plan high-demand appliances.
150–200A+ breaker panel → standard for most new builds and remodels.
Think 10–15 years ahead:
Future EV charging
Home office gear
Possible solar or battery storage
If you’re planning major upgrades, you may go straight to a 200A modern load center instead of a basic 100 amp panel replacement.
2. Book a Professional Electrical Panel Inspection
You need a licensed electrician to look at:
Panel condition: rust, scorch marks, loose or doubled-up circuits
Old house wiring hazards: cloth wiring, aluminum branch circuits, ungrounded outlets
Existing grounding and bonding
Main service cable and meter base
Ask for:
A written quote with:
Panel size (amp rating)
Brand and model of the new breaker panel
What’s included (permits, grounding upgrade, new breakers, surge protection)
For larger or more complex setups (multi-unit buildings, light commercial), the electrician may recommend pairing your new panel with outdoor distribution gear or a low-voltage power distribution box for cleaner, safer load management.
3. Coordinate with the Utility Company
Your electrician usually handles this, but you should know the steps:
Utility approval for service upgrade (e.g., 60A → 200A)
Scheduled power shutoff and reconnect window
Local inspection requirements before the utility restores power
Plan for a 4–8 hour power outage on installation day. Don’t schedule this during extreme heat/cold if you rely on electric HVAC.
4. What Actually Happens on Installation Day
A typical fuse-to-breaker upgrade looks like this:
Power is shut off at the meter by the utility.
Old fuse electrical panel and feeder wires are removed.
New breaker panel (modern load center) is mounted, leveled, and labeled.
Circuits are reconnected, cleaned up, and properly grouped.
Grounding and bonding are upgraded if needed.
Main breaker and branch circuit breakers are installed and tested.
Inspector signs off, utility restores power.
In larger or more advanced systems (industrial, campuses, or advanced distribution), this upgrade can be integrated with high-voltage switchgear or a compact ring main unit to improve reliability and sectionalize faults upstream of the building.
5. Smart Add-Ons to Do During the Upgrade
When you’re already opening the wall and pulling permits, a few extras are worth it:
Whole-home surge protection Protects electronics from power surge events and lightning.
AFCI & GFCI breakers Arc-fault and ground-fault protection for better fire and shock safety.
Same day or next day – Inspection and power reinstated
From first call to final sign-off, most homeowners see a 1–3 week total timeline, depending on how fast the city and utility move.
If your fuse electrical panel is old, undersized, or giving constant blown fuse issues, upgrading to a modern breaker system is one of the highest-ROI safety upgrades you can make. Done right, it sets your home up for the loads you have today and the tech you’ll add tomorrow.
Costs, Savings, and ROI: Making the Numbers Work
Upgrading from a fuse electrical panel to a modern breaker panel looks expensive at first glance, but the numbers usually work in your favor long term.
Typical Cost Breakdown
Actual prices depend on your country, labor rates, and how old your wiring is, but here’s a realistic ballpark:
Basic 100 amp panel replacement (panel only):
Roughly $600–$1,200 for the panel and materials
Plus $600–$1,500 for licensed electrician labor
Full service upgrade (often 100A to 150A or 200A):
$1,800–$4,000+ including:
New breaker panel (load center)
Main disconnect / switch isolator
Grounding upgrades and bonding
Permits and inspections
Extras that can raise the price:
Rewiring old circuits
Adding surge protection
Adding sub-panels for garages, basements, or workshops
Repairing damaged meter bases or service entrances
If you’re planning a full modern system with coordinated protection and safe isolation, pairing a breaker panel with quality gear like a dedicated switch isolator usually adds a small cost but a big safety and convenience benefit.
Hidden Savings Most People Miss
A fuse panel upgrade isn’t just “avoiding old stuff.” You actually save money (and headaches) in ways that don’t show up on the quote:
Insurance:
Lower premiums or avoiding policy cancellation for old fuse boxes
Easier to insure older homes after an electrical panel inspection and upgrade
Fewer emergency call-outs:
No more late-night electrician visits for mystery outages or melting fuses
Lower risk of fire and major damage:
One avoided electrical fire easily pays for the entire upgrade
Better support for efficient devices:
EV chargers, heat pumps, induction cooktops, and modern HVAC run safer and more efficiently on a properly sized panel
Funding Tips to Reduce the Upfront Hit
You don’t need to pay for everything out of pocket on day one. Popular options:
Utility or government programs:
Energy-efficiency rebates for service upgrades tied to heat pumps or EVs
Low-interest “energy upgrade” loans
Bank financing:
Home improvement loans or line of credit
Spread the cost over 3–5 years instead of a single large payment
Bundle projects:
Combine panel upgrade with other electrical work (EV charger, solar-ready wiring, or low-voltage switchgear) to get better pricing per job
Ask your electrician to clearly separate “must-have safety work” from “nice-to-have extras” so you can phase the project if needed.
Simple Long-Term ROI Math
Here’s a straightforward way to look at return on investment:
Assume:
Panel upgrade cost: $2,500 (mid-range example)
Insurance savings: $100/year
Avoided emergency calls / repairs: $150/year average
Reduced risk of major loss: even one avoided $10,000 fire in 20 years
Even without putting a dollar value on safety:
Direct annual savings: about $250/year
Payback period: around 10 years
After that, it’s pure financial benefit, plus:
Higher resale value and easier home sale
Compliance with modern electrical and insurance requirements
Peace of mind that your system can handle today’s loads
Bottom line: if your fuse electrical panel is old or undersized, upgrading isn’t just a safety decision—it’s usually a smart financial move over the life of your home.
Essential Maintenance Tips To Extend Your Fuse Electrical Panel’s Life
You might not upgrade your fuse electrical panel today, but you can absolutely keep it safer and more reliable until you do. Here’s how I recommend you handle basic maintenance without getting in over your head.
Simple Monthly Checks
Do a quick visual check once a month:
Look for burn marks, discoloration, or melted plastic around fuses.
Listen for buzzing, crackling, or humming from the panel.
Check if the panel feels warm or hot to the touch (it should not).
Make sure the cover closes properly and no wires are exposed.
Confirm labels are clear so you know which fuse controls which circuit.
If you see scorching, smell burning, or feel heat, stop using heavy appliances on that circuit and book an immediate electrical panel inspection.
Yearly Pro Tune-Up
Once a year, bring in a licensed electrician:
Tighten loose connections and check for corrosion.
Test amperage and look for signs of electrical overload.
Confirm the panel and main service still meet local code and insurance electrical requirements.
Check grounding, bonding, and surge protection.
If you’re adding new gear (EV charger, hot tub, big AC), mention it so they can tell you if your 60–100 amp panel needs replacement or an upgrade path.
Prevent Overloads The Smart Way
Old fuse boxes were never designed for today’s loads. To avoid constant blown fuse replacement and overheating:
Don’t run multiple high‑draw appliances (oven, dryer, space heater) on the same circuit.
Use power strips with surge protection, not cheap multi-plugs.
Avoid daisy-chaining extension cords and adapters.
Stick to the correct fuse amperage rating (never “oversize” a fuse to stop it blowing).
Spread out usage: heavy tools in the garage or basement electrical panel circuits should be used one at a time.
If you’re constantly replacing fuses on the same circuit, that’s a red flag the load is too high or the wiring is tired.
Build A Basic Panel Emergency Kit
Keep a small kit next to (not inside) your home fuse box:
A flashlight or headlamp with fresh batteries.
A pack of the correct plug and cartridge fuse types for your panel.
Insulated screwdriver and work gloves.
A printed circuit map and emergency contact for your electrician.
If you also use external switchgear or need safe isolation for maintenance, pairing your panel with a quality switch disconnector from a trusted source (like our own industrial-grade switch-disconnector solutions at https://cnsovio.com/switch-disconnector/) adds another layer of safety and control.
These simple habits keep your fuse electrical panel running safer, buy you time before a full circuit breaker upgrade, and cut the risk of sudden failures when you need power most.
If your GE dryer is tumbling but blowing ice-cold air—or suddenly won’t start at all—there’s a very good chance the thermal fuse just sacrificed itself to protect your home. The good news?On most General Electric dryers, a bad thermal fuse is one of the easiest and cheapest fixes you can do yourself… if you know the right part number, the exact location, and how to test it with […]
We use cookies to enhance your browsing experience, serve personalised ads or content, and analyse our traffic. By clicking "Accept All", you consent to our use of cookies.